Great Lean presentations don’t just deliver information; they guide attention.
When you want an audience to understand flow, sequence, bottlenecks, or metrics, the last thing you need is a cluttered slide revealing everything at once. A powerful solution is a sequential reveal animation, a technique that introduces information precisely when it matters.
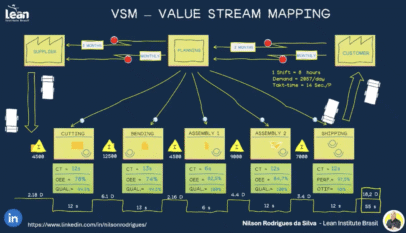
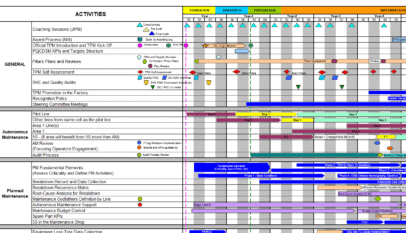
This approach transforms a static Value Stream Map or process explanation into a clear, controlled narrative. The reader sees only what they need to understand at that moment, allowing concepts to build naturally.
What follows is a complete walkthrough on how to create those polished, professional reveal animations used in high-level Lean workshops and operational excellence presentations.
Start by Structuring Your Slide
The first step is getting every object onto the slide before animating anything. This may feel counterintuitive, but it enables you to see the full picture and position everything correctly.
Insert the core components:
- Process boxes
- Labels or station names
- Arrows and flow connectors
- Metrics such as cycle time, efficiency, quality, or inventory
- Icons or small visuals for emphasis
- Takt time or summary data
Each item must be a separate object.
This gives you full control over how they appear.
Once objects are placed, align them so the flow is straight, balanced, and visually smooth. PowerPoint’s Align and Distribute commands make this quick and precise.
A clean structure is the foundation of a clean animation.
Group the Elements That Belong Together
A well-designed animation feels synchronized because each component appears exactly when expected. Grouping keeps related items together and prevents text or metrics from drifting or popping up separately.
Grouping examples:
- A process box with its station title
- A set of metrics that belong to one step
- Inventory icons with their labels
- Arrows with their associated measurement text
To group items:
- Select everything that forms one unit
- Right-click → Group
Grouped units animate as a single object, ensuring consistency and avoiding awkward timing mismatches.
Choose Clean, Professional Animations
This style of presentation is built on clarity, not special effects.
The two animations that consistently deliver a professional result are:
- Appear – simple, fast, and crisp
- Fade – smooth, controlled, and elegant
These animations don’t draw attention to themselves; they simply reveal the next part of the story.
To apply an animation:
- Select the object or group
- Go to Animations
- Choose Appear or Fade
- Open the Animation Pane to manage the full sequence
The Animation Pane becomes your control center for building a polished reveal.
Build a Logical Reveal Sequence
This is where the animation becomes a story.
With everything on the slide and grouped appropriately, begin sequencing the reveal from left to right or top to bottom, depending on the nature of your process.
A strong reveal sequence usually follows a pattern like this:
- Title introduction
- Main frame or boundary (optional)
- First process block
- Data supporting that block
- Connector or arrow to the next step
- Second process block
- Metrics for the second block
- Continue step-by-step until the full flow is visible
- Add inventory or waiting indicators
- Reveal takt time, summary, or total lead time last
Sequencing allows you to explain each part of the process without overwhelming the audience.
To reorder your sequence:
- Drag items in the Animation Pane to the correct position
- Keep the logic consistent and predictable
When the reveal follows natural process flow, comprehension increases dramatically.
Automate the Reveal with “After Previous”
To create smooth, uninterrupted transitions, convert most animations from On Click to After Previous.
This setting triggers each animation automatically after the one before it finishes. The slide progresses naturally, almost like a narrated story.
Use On Click sparingly.
It works best when introducing a new section or resetting the audience’s attention.
For everything else, “After Previous” creates rhythm and momentum in the presentation.
Fine-Tune Timing for Professional Pace
Timing is where your animation becomes either polished or distracting.
Ideal timing settings:
- Duration: 0.25 to 0.50 seconds
- Delay: 0.05 to 0.20 seconds (optional for staggered effect)
Shorter durations feel sharp.
Longer durations create a slightly cinematic feel.
To adjust timing:
- Right-click an animation in the Animation Pane
- Select Timing
- Adjust Duration and Delay
- Keep Start: After Previous
Good timing ensures the reveal flows smoothly and keeps attention where it belongs.
Introduce Arrows and Connectors with Subtlety
Arrows matter, but they shouldn’t dominate.
Fade is the best choice for arrows because it creates a gentle entry without pulling focus away from the process itself.
Best practice:
- Animation = Fade
- Duration = 0.50 seconds
- Start = After Previous
- Position them after the block they visually extend or lead into
This keeps the flow readable and reinforces direction without noise.
Use the Animation Pane to Perfect the Order
The Animation Pane is the backbone of a well-organized reveal.
It shows every animation in order and lets you refine the sequence with precision.
Check for:
- Items appearing out of sequence
- Accidental On Click triggers
- Metrics appearing before their stations
- Arrows showing too early
- Summary data revealing too soon
Lean presentations rely heavily on clarity.
A well-ordered Animation Pane ensures your visual narrative remains tight and intentional.
Test the Full Animation
Once your sequence is complete:
- Open Slide Show → From Current Slide
Watch how each element appears:
- Does the order make sense?
- Is the pacing too fast or too slow?
- Does any object jump or appear abruptly?
- Do arrows match the process flow?
- Are grouped items staying together?
Small improvements at this stage dramatically improve the final impact.
Optional Enhancements for Extra Professionalism
Create a Morph-Based Slide Transition
Duplicate the slide, make small positional changes, and apply a Morph transition to create a natural zoom or movement.
Add a Spotlight Effect
Dim the slide with a semi-transparent overlay and cut out a circle or rectangle to spotlight a specific step.
Use Subtle Shadows
Light shadows under process boxes add depth and focus, especially when combined with animation.
Small upgrades like these give your animation a refined, modern feel—perfect for Lean leadership presentations.
Final Summary
A well-executed reveal animation transforms your slide deck into a clear, engaging visual explanation. Whether you’re presenting a Value Stream Map, demonstrating a future state improvement, or teaching process flow, this animation technique delivers clarity that static slides simply can’t match.
The workflow is simple and repeatable:
- Build your entire layout
- Group related items
- Apply clean animations
- Sequence logically
- Set everything to After Previous
- Adjust timing
- Add connectors and supporting visuals
- Test and refine
Once you master this approach, you can apply it across all kinds of Lean content—from VSMs to SOPs, from Kaizen updates to operational dashboards.
This is one of the most effective ways to bring Lean concepts to life on screen and guide your audience through a clear, purposeful narrative.
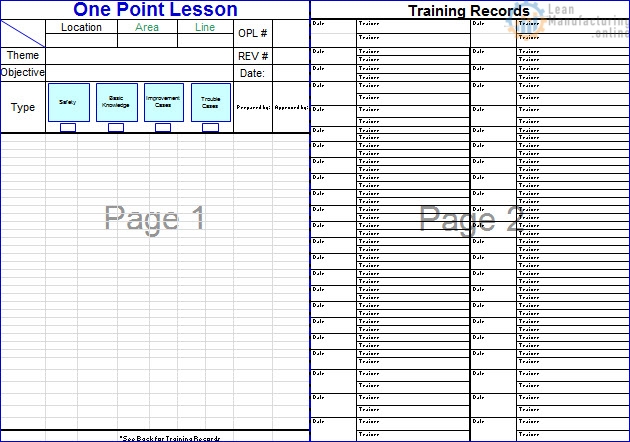
To get a better understanding of how it works, check this PPTX sample provided by Nilson Rodrigues da Silva, follow him for more Lean visual materials.


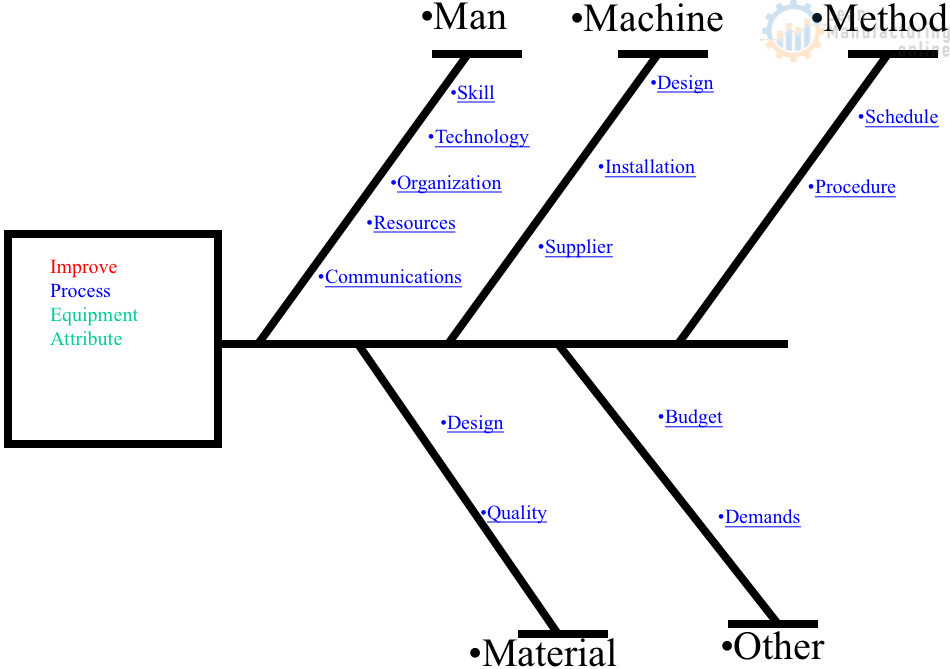
4M Analysis Process
The purpose of this procedure is to define the steps to do a 4M …