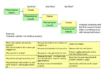
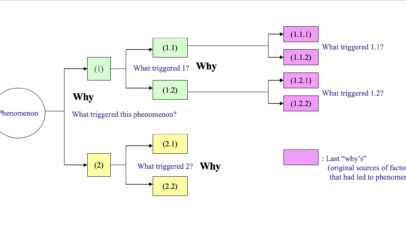
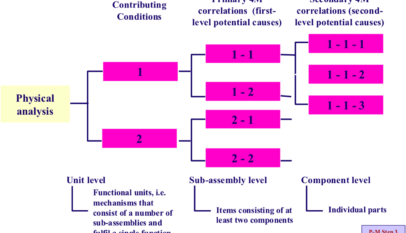
As Figure “The Overall Structure of P-M Analysis” shows, the structure of P-M Analysis is like a branching tree. The sections of the diagram from left to right correspond to the first four P-M Analysis Steps:
- Step 1 – Clarify the phenomenon,
- Step 2 – Perform a physical analysis of the phenomenon,
- Step 3 – Identify the phenomenon contributing conditions, and
- Step 4 – Examine the relationships with the 4Ms).
Although the diagram only goes as far as the secondary 4-M correlations (which is usually all that is necessary), it can be extended as far as the tertiary and quaternary correlations if required.

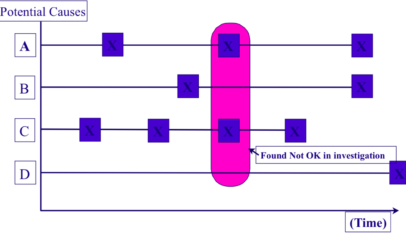
Where to start and finish a P-M Analysis
People tend to want to begin a P-M Analysis on whatever they have identified as a problem from examining the routine production data. However, as Figure “Where to Begin a P-M Analysis” shows, it is important to identify the specific reasons for the problem first (using Why-Why Analysis) and then take one of these reasons as a starting point for the P-M Analysis. The P-M Analysis should be stopped when it has reached the level of the deterioration of individual components (such as the wearing-out of a shaft, or the loss of strength of a spring). As mentioned above, this will usually be at the secondary 4-M correlation level, although it may be necessary to go further in some cases. Once the deterioration modes have been identified, they should be then surveyed to find out if they are actually happening. The ones that are actually happening should then be investigated further to determine why the people looking after the machines had not prevented them, and measures should be put in place to make sure they are prevented in future.

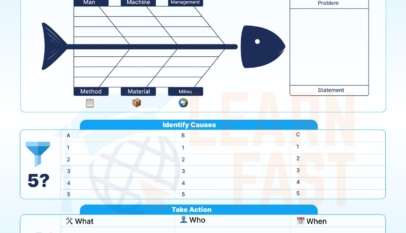


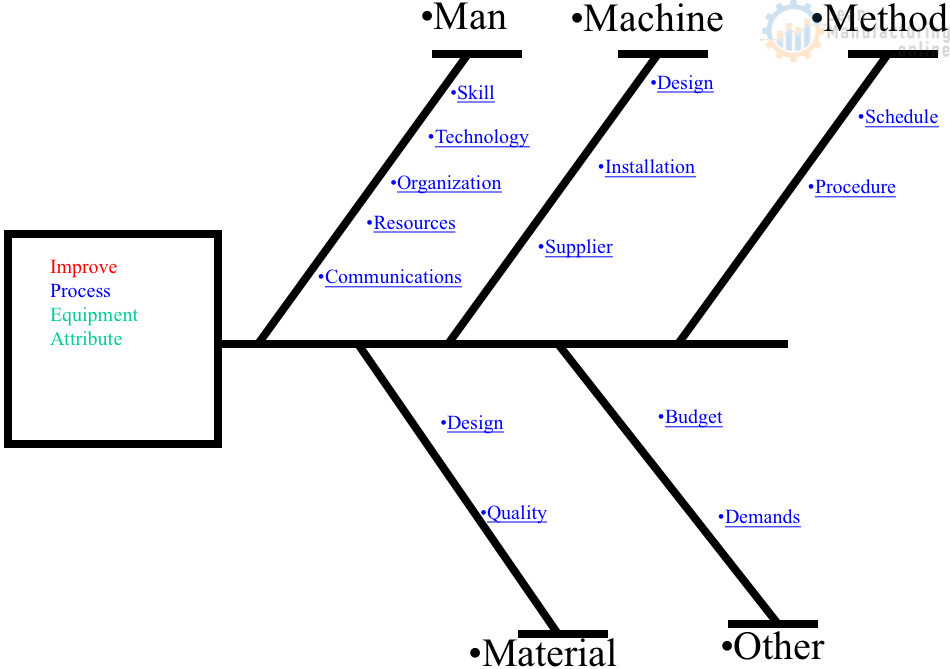
4M Analysis Process: Root Cause Guide for Manufacturing
Learn how to use 4M Analysis to find manufacturing root causes across People, Machine, Method, and Material with diagrams, examples, and checklist.